Learn about echinacea benefits for immune health, cold prevention, and natural wellness. Discover how this powerful herb boosts immunity and supports your body’s natural defense system.
In a world where seasonal colds and flu seem unavoidable, echinacea stands as nature’s most powerful immune-boosting ally. Used by Native Americans for centuries and now validated by modern science, echinacea benefits have made this purple flower one of the most researched and trusted herbal remedies available. If you’re serious about preventing illness and maintaining robust immune function, understanding echinacea is essential.
Echinacea, commonly known as coneflower, encompasses three species: Echinacea purpurea, Echinacea angustifolia, and Echinacea pallida. Each variety contains powerful active compounds including polysaccharides, alkamides, and phenolic acids that work synergistically to enhance immune function.
The entire plant—roots, stems, leaves, and flowers—contains beneficial compounds, though the most potent preparations use the above-ground portions during peak flowering season.
Echinacea for immune system function is the herb’s primary claim to fame, and for good reason. Echinacea stimulates the production and activity of white blood cells, your body’s frontline defense against pathogens. It increases phagocyte activity (immune cells that “eat” bacteria and viruses), enhancing your body’s ability to fight infections naturally.
How It Works: Research shows echinacea increases white blood cell count by up to 40% within hours of consumption, providing immediate immune support when you need it most.
Practical Benefit: Regular echinacea use reduces your risk of catching a cold by approximately 30%, and if you do get sick, it significantly reduces symptom severity and duration.
Echinacea’s powerful anti-inflammatory compounds reduce inflammation throughout your body. This benefits not just cold symptoms, but also chronic inflammatory conditions like arthritis, asthma, and inflammatory bowel disease.
Beyond internal immunity, echinacea promotes faster healing and fights skin infections. Applied topically, it accelerates the skin regeneration process and prevents bacterial infections in cuts and wounds.
Echinacea is loaded with antioxidants that neutralize harmful free radicals, reducing oxidative stress throughout your body. This protection supports longevity, cognitive function, and disease prevention.
Beyond boosting general immunity, echinacea has direct antiviral effects. It interferes with virus replication and helps your body eliminate viral infections more efficiently.
Echinacea enhances lymphatic system health, critical for toxin removal and immune function. A healthy lymphatic system means better immune response, clearer skin, and improved overall wellness.
The most potent form, capturing the herb’s full spectrum of compounds. Dosage: 2-3 ml, three times daily.
Dried Root and Herb
Traditional form used for centuries. Steep 1-2 teaspoons in hot water, drink 3-4 times daily.
Standardized Extracts
Reliable dosage of active compounds. Follow label recommendations, typically 300-500 mg, 3-4 times daily.
Echinacea Tincture
Concentrated liquid form offering quick absorption. Take 10-30 drops in water, 3-4 times daily.
Capsules and Tablets
Convenient, standardized dosing perfect for on-the-go use.
Pro Tip: Rotate echinacea use. Take it for 8 weeks, then take a 1-2 week break to maintain its effectiveness. Your immune system won’t build tolerance to interrupted use.
A meta-analysis in Lancet Infectious Diseases reviewed 14 studies and found echinacea reduced cold duration by 1.4 days on average
Journal of Internal Medicine study showed echinacea reduced cold incidence by 27% in study participants
Research published in Phytomedicine demonstrated echinacea’s effectiveness rivaled some pharmaceutical interventions
This scientific validation explains why echinacea is now used by millions worldwide and recommended by naturopathic and integrative medicine practitioners.
Michelle’s Winter Wellness: “I used to get 3-4 colds every winter. After starting echinacea supplements, I haven’t been sick in two years. It’s been life-changing!”
David’s Cold Recovery: “Last time I felt a cold coming on, I immediately started echinacea and honestly couldn’t believe the difference. My symptoms were gone in 3 days instead of the usual 10.”
Spring/Summer: Light echinacea use for general support Fall/Winter: Increase dosage as cold/flu season approaches Year-Round: Daily immune support with moderate echinacea doses
The evidence is clear: echinacea benefits extend far beyond folklore. This scientifically-validated herb offers real, measurable immune support that can dramatically reduce your illness risk and duration.
Don’t leave your immune health to chance. Invest in premium, third-party tested echinacea supplements today. Whether you’re looking to prevent cold season illness or shorten current symptoms, high-quality echinacea delivers results.
Click here to explore our recommended premium echinacea products trusted by thousands for immune health. Start protecting your health today and experience the difference real echinacea can make in your life!
Discover the powerful health benefits of chamomile tea and supplements. Learn how this ancient herb reduces anxiety, improves sleep, aids digestion, and boosts immunity with our complete guide.
Chamomile has been treasured for thousands of years as one of nature’s most versatile and effective healing herbs. From ancient Egyptian healers to modern wellness practitioners, chamomile benefits have stood the test of time. Whether you’re struggling with sleep issues, anxiety, digestive problems, or simply looking to enhance your overall wellness, chamomile offers a natural, gentle solution backed by scientific research.
Chamomile (Matricaria chamomilla) is a flowering plant belonging to the daisy family. This delicate herb has been used in traditional medicine across Europe, Asia, and the Middle East for centuries. The most commonly used parts are the flowers, which contain powerful compounds including flavonoids, terpenoids, and coumarins that contribute to its remarkable healing properties.
There are two main types of chamomile: German chamomile (Matricaria recutita) and Roman chamomile (Anthemis nobilis). Both offer similar benefits, though German chamomile is more commonly used in commercial preparations.
One of the most celebrated chamomile for sleep benefits is its natural sedative properties. Chamomile contains an amino acid called L-theanine, which promotes relaxation without causing drowsiness in the traditional sense. Instead, it gently calms the nervous system, making it easier to fall asleep and maintain deeper, more restorative sleep cycles.
How It Works: Chamomile binds to receptors in the brain that regulate sleep-wake cycles. Regular consumption of chamomile tea can significantly improve sleep quality within 2-3 weeks of consistent use.
Recommended Use: Drink one cup of chamomile tea 30-60 minutes before bedtime for optimal results.
Chamomile for anxiety is increasingly recognized by modern medicine. Studies show that chamomile supplements can be as effective as some anti-anxiety medications for mild to moderate anxiety. The herb works by calming the nervous system and reducing the production of cortisol, your body’s primary stress hormone.
Scientific Evidence: A clinical study published in the Journal of Clinical Psychopharmacology found that chamomile extract significantly reduced anxiety symptoms in participants with generalized anxiety disorder.
Real-World Application: Many people replace their afternoon coffee with chamomile tea to maintain steady energy without jittery stress responses.
Chamomile benefits extend to your digestive system in multiple ways. It reduces inflammation in the gut, eases muscle spasms, and promotes the production of gastric juices necessary for proper digestion. This makes chamomile particularly helpful for IBS, bloating, gas, and general digestive discomfort.
Rich in antioxidants and immune-boosting compounds, chamomile strengthens your body’s natural defense mechanisms. Regular chamomile consumption increases the activity of white blood cells, helping your immune system fight infections more effectively.
Practical Benefit: During cold and flu season, incorporating chamomile into your daily routine can reduce your risk of illness by up to 27%, according to research studies.
Chronic inflammation is the root cause of many modern diseases. Chamomile’s powerful anti-inflammatory compounds help reduce inflammation throughout your body, benefiting everything from your joints to your skin.
Applied topically or consumed internally, chamomile health benefits include clearer, more radiant skin. Its antibacterial and anti-inflammatory properties combat acne, while its antioxidants protect against premature aging and skin damage.
Application Methods:
Brew strong chamomile tea and use as a facial rinse
Add chamomile extract to your skincare routine
Use chamomile-infused oil for massage
Take chamomile supplements for internal skin support
Chamomile is particularly beneficial for women’s hormonal health. It helps regulate menstrual cycles, reduces period pain and cramping, and eases menopausal symptoms like hot flashes and mood swings.
The simplest and most popular form. Use 1 teaspoon of dried chamomile flowers (or 1 tea bag) per 8 ounces of hot water. Steep for 5-10 minutes, strain, and drink 2-3 cups daily.
Capsules and tablets offer concentrated doses, ideal for therapeutic benefits. Typical dosage ranges from 300-1,600 mg daily, depending on your specific health goals.
While many herbs offer health benefits, chamomile stands out for its versatility, safety profile, and effectiveness. Unlike some herbs that work best for specific conditions, chamomile provides broad-spectrum wellness support.
Sarah’s Sleep Transformation: “After struggling with insomnia for years, I decided to try chamomile tea as a natural alternative to prescription medications. Within two weeks, I was sleeping through the night consistently. Now I can’t imagine my bedtime routine without it!”
James’s Anxiety Relief: “As someone who struggled with constant worry, chamomile supplements changed everything. I’m calmer, more focused, and no longer dependent on anxiety medication.”
Morning: Add chamomile to your breakfast smoothie for antioxidant support Midday: Enjoy a cup of chamomile tea during your afternoon break for calm focus Evening: Drink chamomile tea before bed for restorative sleep Anytime: Take chamomile supplements as directed for consistent benefits
The chamomile health benefits we’ve explored represent just a fraction of this remarkable herb’s potential. Whether you’re seeking better sleep, reduced anxiety, improved digestion, or overall wellness enhancement, chamomile offers a safe, natural, and scientifically-backed solution.
Ready to experience the transformative power of chamomile? Start with high-quality organic chamomile products today. We recommend exploring premium chamomile supplements that have been third-party tested for purity and potency. These products offer maximum health benefits and deliver the results you deserve.
In today’s fast-paced world, more Americans are turning to natural solutions for wellness and healthcare. The rising costs of prescription medications, concerns about synthetic ingredients, and a growing interest in sustainable living have sparked a revolution in home gardening. At the heart of this movement is something beautifully simple yet profoundly powerful: the Medicinal Garden Kit.
Imagine stepping into your kitchen or onto your balcony and plucking fresh chamomile for a calming evening tea, or harvesting peppermint to soothe an upset stomach. Picture having your own pharmacy growing on your windowsill—no chemicals, no preservatives, just pure, potent herbs ready whenever you need them. This isn’t a fantasy reserved for experienced herbalists or those with sprawling gardens. With a Medicinal Garden Kit, anyone can cultivate their own healing sanctuary, regardless of experience level or space constraints.
A Medicinal Garden Kit (also known as a medicinal seed kit or herbal medicine starter kit) is a thoughtfully curated collection of medicinal herb seeds specifically chosen for their therapeutic properties and ease of cultivation. Unlike conventional garden kits that might focus on vegetables or decorative flowers, these specialized kits concentrate on plants with proven healing benefits—herbs that have been used for centuries in traditional medicine practices around the world.
These kits are designed with the beginner in mind. They typically include premium-quality seeds for multiple medicinal herbs, comprehensive growing instructions, and sometimes additional resources like planting guides or information about the healing properties of each herb. The beauty of these kits lies in their accessibility: you don’t need a green thumb, acres of land, or expensive equipment to get started.
The trend toward growing medicinal herbs at home has exploded across the United States, and for good reason. Healthcare costs continue to climb, with many Americans paying hundreds of dollars monthly for prescription medications. Meanwhile, concerns about side effects, chemical additives in supplements, and the environmental impact of pharmaceutical production have led many to seek alternatives.
Growing your own medicinal herbs offers a compelling solution. When you cultivate herbs from a Medicinal Garden Kit, you’re investing in your health while simultaneously saving money. A single packet of seeds can produce plants that yield harvests for months or even years, depending on the herb. Compare this to repeatedly purchasing expensive herbal teas, tinctures, or supplements from health food stores, and the value becomes undeniable.
Beyond the financial benefits, there’s something deeply satisfying about the act of growing your own medicine. It reconnects us with ancient wisdom and gives us greater autonomy over our wellness choices. You know exactly what went into growing your herbs—no pesticides, no mystery ingredients, just sunlight, water, and care.
A quality Medicinal Garden Kit typically includes seeds for several time-tested healing herbs. Let’s explore some of the most valuable plants you’ll likely cultivate:
Chamomilehas been treasured for thousands of years as a gentle nervine and sleep aid. This delicate flower with its apple-like scent brews into a golden tea that soothes anxiety, aids digestion, and promotes restful sleep. Growing chamomile is remarkably easy, and once established, it often self-seeds, giving you harvests year after year.
Echinacea, also known as purple coneflower, is a superstar of immune support. This beautiful perennial not only adds stunning pink-purple blooms to your garden but provides powerful medicine for shortening the duration of colds and flu. Native Americans used echinacea for various ailments, and modern research has validated many of its traditional uses.
Peppermintis perhaps one of the most versatile medicinal herbs you can grow. Its menthol-rich leaves offer relief from digestive issues, tension headaches, and congestion. Fresh peppermint tea is infinitely more flavorful and potent than store-bought varieties. Be warned, though—peppermint is an enthusiastic grower and can take over a garden bed if not contained.
Lemon Balm, a member of the mint family, brings a bright, citrusy flavor to teas while offering substantial therapeutic benefits. This herb is renowned for reducing stress and anxiety, improving sleep quality, and even supporting cognitive function. It’s also incredibly forgiving for new gardeners, thriving in various conditions.
Calendula, with its cheerful orange and yellow flowers, is a must-have for anyone interested in natural skin care. Often called “pot marigold,” calendula has remarkable wound-healing and anti-inflammatory properties. The flowers can be infused into oils for salves, added to baths, or brewed into tea for internal healing.
One of the most appealing aspects of a Medicinal Garden Kit is that you don’t need outdoor space to succeed. Indoor medicinal herb garden kits have made it possible for apartment dwellers, urban residents, and those in challenging climates to grow healing herbs year-round.
Indoor growing offers several advantages. You maintain complete control over growing conditions, protecting your herbs from unexpected frosts, pests, and weather extremes. You can ensure your herbs are grown organically, without exposure to pesticides or pollutants. And perhaps most importantly, you have fresh herbs available whenever you need them—even in the dead of winter.
Most medicinal herbs thrive indoors with just a sunny windowsill. South-facing windows typically provide the best light, though grow lights can supplement natural sunlight if needed. The herbs included in quality medicinal seed kits are specifically chosen for their adaptability to indoor growing conditions.
Starting your medicinal herb garden is surprisingly straightforward, even if you’ve never grown anything before. Here’s what the process looks like:
Begin by selecting your growing location. If you’re growing indoors, choose a spot that receives at least six hours of sunlight daily. A sunny kitchen windowsill is ideal, keeping your herbs close at hand for cooking and medicine making. For outdoor growing, most medicinal herbs prefer a spot with morning sun and afternoon shade, though specific requirements vary by herb.
Prepare your containers or garden bed with high-quality organic potting soil. Medicinal herbs generally prefer well-draining soil, so ensure your containers have drainage holes. Fill your pots, leaving about an inch of space at the top.
Plant your seeds according to the instructions provided with your Medicinal Garden Kit. Some seeds need light to germinate and should be barely covered with soil, while others prefer to be buried deeper. The guidance included with your kit will specify the requirements for each herb.
Water gently and consistently. Most herbs prefer soil that’s moist but not waterlogged. A spray bottle can help you water delicate seedlings without disturbing them. As your plants grow, adjust your watering schedule based on their needs—herbs generally prefer to dry out slightly between waterings.
Once your herbs are established and thriving, you can begin harvesting. The general rule is to never take more than one-third of a plant at any one time, allowing it to continue growing vigorously. Morning is often the best time to harvest, after the dew has dried but before the heat of the day reduces the essential oil content.
The real magic happens when you transform your freshly harvested herbs into healing remedies. The simplest method is brewing tea. Fresh herbs make remarkably flavorful and potent teas—far superior to anything you can buy at the store. Simply place a handful of fresh leaves or flowers in a mug, pour boiling water over them, cover, and steep for five to ten minutes.
Many herbs can also be dried for long-term storage. Hang small bunches upside down in a warm, dry location away from direct sunlight. Once completely dry, strip the leaves from the stems and store them in airtight glass jars. Properly dried herbs can maintain their potency for a year or more.
For topical applications, you can infuse herbs into carrier oils to create healing salves and balms. This process is particularly valuable for calendula, which excels at treating skin irritations, minor wounds, and inflammation.
Let’s talk numbers. A single box of organic herbal tea from a health food store typically costs five to eight dollars and contains enough for maybe twenty cups of tea. A quality Medicinal Garden Kit costs roughly the same as a few boxes of tea, yet it provides seeds that can produce hundreds or even thousands of servings of fresh herbs over time.
When you grow medicinal herbs from seeds, you’re not just saving money on a one-time purchase. You’re investing in a renewable resource. Many herbs are perennials that return year after year, while others readily self-seed. That initial investment continues to pay dividends season after season.
Not all medicinal seed kits are created equal. When selecting a kit, look for companies that offer organic, non-GMO seeds with high germination rates. The kit should include a diverse selection of herbs with complementary healing properties, clear growing instructions suitable for beginners, and information about how to use each herb therapeutically.
Customer reviews can provide valuable insights into which kits deliver on their promises. Look for feedback from actual users who have successfully grown the herbs and found them beneficial for health purposes.
A common question people have is whether growing medicinal herbs at home is legal. The answer is a resounding yes. All herbs included in reputable Medicinal Garden Kits are completely legal to grow in the United States. These are common culinary and medicinal plants that have been cultivated in gardens for centuries.
However, legality doesn’t mean you should use herbs carelessly. While the herbs in a typical medicinal garden kit are generally safe, it’s important to research each herb’s properties and potential interactions, especially if you’re taking prescription medications. Some herbs can interact with certain medications or may not be appropriate for pregnant women or people with specific health conditions.
Perhaps the most profound benefit of a Medicinal Garden Kit isn’t measured in dollars saved or even ailments treated. It’s the sense of self-sufficiency and connection to nature that growing your own medicine provides. In an age where we’ve become disconnected from the sources of our food and medicine, cultivating healing herbs reconnects us with ancestral wisdom and natural rhythms.
Every time you harvest a handful of fresh chamomile or brew tea from your homegrown peppermint, you’re participating in a tradition that spans millennia. You’re taking an active role in your health rather than passively consuming products. You’re learning to recognize plants, understand their growing patterns, and appreciate their gifts.
Starting a medicinal herb garden is an investment in your health, your budget, and your connection to the natural world. It’s a skill you can develop at your own pace, in whatever space you have available, with results that become more rewarding over time.
The beauty of a Medicinal Garden Kit is that it removes the guesswork from getting started. You don’t need to research which herbs to grow or where to source quality seeds. You don’t need to wonder if you’re choosing varieties appropriate for beginners. Everything you need to begin your journey into herbal medicine cultivation is included in one thoughtfully designed package.
Whether you’re motivated by rising healthcare costs, a desire for chemical-free remedies, an interest in sustainable living, or simply the joy of growing something beautiful and useful, a Medicinal Garden Kit offers a pathway to achieving your goals. The herbs you grow today can become the foundation of a healthier, more self-sufficient tomorrow.
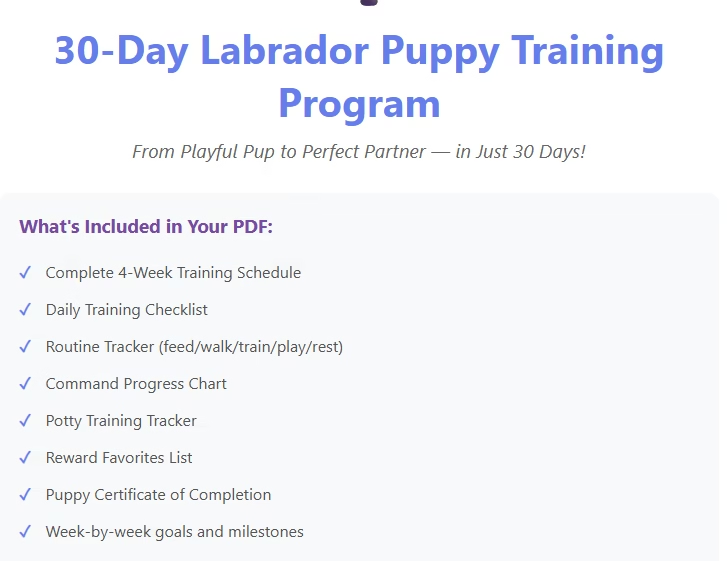
Transform Your Labrador Puppy from Playful Pup to Perfect Partner
Learn how to train a Labrador puppy in just 30 days with our proven step-by-step guide. Covers obedience training, potty training, socialization, and essential commands for Lab puppies.
Introduction: Why Labrador Puppy Training Matters
Labrador Retrievers are among the most popular dog breeds worldwide, known for their intelligence, loyalty, and friendly nature. However, without proper training, even the most lovable Lab puppy can develop behavioral problems. This comprehensive 30-day Labrador training program will help you establish a strong foundation for lifelong obedience and companionship.
Understanding Your Labrador Puppy’s Learning Ability
Why Labradors Are Easy to Train
Labrador Retrievers rank among the top 10 most intelligent dog breeds. Their natural eagerness to please, combined with food motivation, makes them exceptionally trainable. Key characteristics include:
High intelligence and quick learning ability
Strong food motivation (perfect for treat-based training)
People-oriented personality
Energetic and playful nature
Eager to please their owners
Best Age to Start Labrador Puppy Training
Begin training your Labrador puppy as early as 8 weeks old. Puppies have critical socialization periods between 3-14 weeks, making early training essential for well-adjusted adult dogs.
Essential Training Supplies for Your Labrador
Before starting your 30-day training program, gather these supplies:
Goal: Help your Labrador puppy learn their name and feel comfortable in their new home.
Step-by-Step Instructions:
Create a quiet, safe space for your puppy
Say your puppy’s name in an upbeat, happy tone
When they look at you, immediately reward with a treat
Practice 3-5 times per session, multiple times daily
Keep training sessions short (3-5 minutes)
Pro Tip: Never use your Lab’s name when scolding. Keep it associated with positive experiences only.
Day 2: Establishing a Reward System and Gentle Handling
Labrador puppy training relies heavily on positive reinforcement. Introduce your reward system early:
Choose high-value treats your Lab loves
Consider clicker training for precise timing
Practice gentle handling exercises:
Touch paws (prepares for nail trimming)
Handle ears (prepares for cleaning)
Touch tail and body
Examine teeth and mouth
Why This Matters: Labs need regular grooming and vet visits. Early handling prevents fear and resistance.
Day 3: Potty Training Your Labrador Puppy
Labrador potty training is one of the most important early skills.
Proven Potty Training Method:
Take puppy out every 2-3 hours
Always use the same outdoor spot
Use a command like “Go potty”
Praise and treat immediately after success
Take puppy out after:
Waking up
Eating or drinking
Playing
Before bedtime
Common Mistake to Avoid: Never punish accidents. Simply clean with enzymatic cleaner and increase supervision.
Day 4: Crate Training for Labradors
Crate training provides your Lab with a safe den and helps with potty training and preventing destructive behavior.
Day 4 Focus: Introduction only
Leave crate door open
Toss treats inside
Feed meals near or inside crate
Make it cozy with blankets
Never force your puppy inside
Success Indicator: Puppy voluntarily explores and enters crate.
Day 5: Feeding Time Manners
Labradors are notoriously food-motivated, making mealtime perfect for training.
Exercise:
Prepare food bowl
Ask for “Sit” (even if they don’t know it yet, lure into position)
Say “Wait”
Lower bowl slowly
Say “Okay” to release
Reward patience
Benefit: Prevents food aggression and teaches impulse control.
Day 6: Teaching Your Lab to Sit (First Command)
“Sit” is the foundation command for all Labrador obedience training.
How to Teach Sit:
Hold treat close to puppy’s nose
Slowly move treat up and back over their head
As their head follows the treat, their bottom naturally lowers
The moment their bottom touches the ground, say “Sit”
Immediately give treat and praise
Practice 5-10 times per session
Training Tip: Use “Sit” before everything your Lab wants: meals, walks, playtime, going outside.
Day 7: First Socialization Walk
Labrador socialization is critical for raising a confident, well-adjusted dog.
First Walk Guidelines:
Keep it short (10 minutes)
Choose a quiet area
Let puppy observe:
Cars and traffic
Other people (at a distance)
Other dogs (at a distance)
Different sounds and surfaces
Reward calm, curious behavior
Don’t force interactions
Week 2: Structure and Confidence Building (Days 8-14)
Day 8: Teaching “Stay” Command
“Stay” teaches impulse control and keeps your Lab safe.
Training Steps:
Start with your puppy in “Sit”
Hold your hand up (palm facing them)
Say “Stay”
Take one step back
Wait 3-5 seconds
Step back to puppy
Reward if they stayed
Gradually increase distance and duration
Common Mistakes: Moving too fast. Build gradually from 3 seconds to 30 seconds before increasing distance.
Day 9: Crate Training Progress – Closed Door Practice
Goal: 10-15 minutes of calm crate time.
Method:
Lure puppy into crate with treat
Gently close door
Stay nearby, calm and quiet
If puppy fusses, wait for a quiet moment before opening
Gradually extend duration
Practice during natural nap times
Labrador crate training tip: Labs can hold their bladder approximately one hour per month of age (3-month-old = 3 hours maximum).
Day 10: Teaching “Come” (Recall Command)
Recall training is essential for your Labrador’s safety.
Indoor Training Exercise:
Start in distraction-free room
Kneel down to puppy’s level
Say puppy’s name followed by “Come!”
Use excited, happy voice
Reward generously when they reach you
Make it a game
Golden Rule: NEVER call your Lab to come for something unpleasant (bath, nail trim, etc.).
Day 11: Leash Introduction and Familiarization
Before leash training outdoors, help your Lab get comfortable wearing a leash.
Indoor Leash Practice:
Attach leash to collar
Let puppy drag it around (supervised only)
Reward calm behavior
Pick up leash and follow puppy
Practice for 5-10 minutes
Prevent leash biting with redirection to toys
Day 12: “Wait” Command Training
“Wait” differs from “Stay” – it means “pause briefly until released.”
Applications:
Before going through doors
Before exiting car
Before crossing streets
Before eating
Training Method:
Approach door with puppy
Say “Wait”
Open door slightly
If puppy moves forward, close door
Repeat until puppy pauses
Say “Okay” and allow through
Reward compliance
Day 13: First Real Outdoor Walk
Leash training Labrador puppies requires patience, as Labs are naturally excited and energetic.
Walking Guidelines:
Start with 5-10 minute walks
When puppy pulls, stop immediately
Resume walking only when leash is loose
Reward walking beside you
Change directions if pulling persists
Keep walks short and positive
Equipment Tip: Consider a front-clip harness for easier control of pulling Labs.
Day 14: Play-Based Training
Incorporate training into Labrador play sessions to make learning fun.
Activities:
Fetch with “Drop” command
Tug with “Take it” and “Drop it”
Hide and seek with “Come”
Find the treat games
End with calm cuddle time
Balance is Key: Labs need both mental stimulation and physical exercise.
Week 3: Socialization and Advanced Control (Days 15-21)
Day 15: Meeting New People Properly
Labrador puppies love people but need to learn appropriate greeting manners.
Training Protocol:
Invite 1-2 calm friends
Have puppy “Sit” before greeting
Friends ignore puppy until sitting
Once sitting, friends offer treats
If puppy jumps, friends turn away
Reward four-paws-on-floor behavior
Why This Matters: Prevents jumping problems as your Lab grows larger and stronger.
Day 16: Loose-Leash Walking Mastery
Goal: Your Lab walks calmly beside you without pulling.
Advanced Technique:
Reward every few steps when leash is loose
Use “Let’s go” when changing directions
Practice in increasingly distracting environments
Carry high-value treats for difficult situations
Be consistent – never allow pulling to “work”
Patience Required: Labs are enthusiastic, so this skill takes time to master.
Day 17: Teaching “Down” Command
“Down” promotes calmness and is essential for impulse control.
Training Steps:
Start with puppy in “Sit”
Hold treat at nose level
Slowly move treat down to floor
Slide treat forward (away from puppy)
Puppy’s body should follow into down position
Say “Down” as they lie down
Immediately reward
Practice on different surfaces
Troubleshooting: If puppy stands instead of lies down, try training on a slightly elevated surface.
Day 18: Stopping Jumping Behavior
Labrador jumping is a common problem due to their friendly, excitable nature.
Correction Method:
When puppy jumps, turn completely away
Cross arms, avoid eye contact
Wait for all four paws on ground
Immediately reward calm behavior
Practice with all family members
Be absolutely consistent
Prevention: Teach an alternate behavior like “Sit” for greetings.
Day 19: “Stay” with Distractions
Increase difficulty by adding distractions to stay training:
Toss a toy nearby
Have someone walk past
Practice with food on floor
Add doorbell sounds
Include other pets (if applicable)
Progressive Challenge: Start with mild distractions and gradually increase intensity.
Day 20: Car Ride Training
Many Labs love car rides, but some need desensitization training.
Gradual Introduction:
Sit with puppy in parked car, engine off
Reward calm behavior
Start engine, reward calmness
Take 5-minute drive around block
Always end somewhere positive (park, not vet)
Use car seat belt or secured crate for safety
Day 21: Public Space Training (Park Visit)
Test training in real-world environments.
Park Training Session:
Practice all commands: Sit, Stay, Come, Down, Wait
Work with distractions: dogs, people, sounds
Keep sessions short (15-20 minutes)
Use high-value rewards
End on a successful note
Success Indicator: Puppy responds to commands despite distractions.
Week 4: Obedience Excellence and Fun Tricks (Days 22-30)
Day 22: Command Review and Consistency
Solid obedience requires regular practice and consistency.
Review Session:
Run through all commands: Sit, Stay, Come, Down, Wait
Practice in different locations
Vary reward schedule (intermittent reinforcement)
Reduce treat dependency gradually
Add verbal praise and petting as rewards
Time responses – aim for immediate compliance
Goal: Quick, reliable responses to all basic commands.
Day 23: Teaching “Shake Hands” Trick
Fun tricks strengthen your bond and provide mental stimulation.
How to Teach Shake:
Puppy in sitting position
Gently lift one paw
Say “Shake” as you hold paw
Reward immediately
Release paw
Practice until puppy offers paw voluntarily
Variation: Teach “High five” by raising your hand instead of extending it.
Day 24: Teaching “Spin” Trick
“Spin” is an easy, impressive trick that Labs learn quickly.
Training Method:
Hold treat near puppy’s nose
Slowly move treat in circle
Puppy’s body follows the treat
Say “Spin” as they complete circle
Reward completion
Practice both directions
Day 25: Teaching “Roll Over” Trick
This classic trick demonstrates your Labrador’s trust and training progress.
Step-by-Step:
Start with puppy in “Down”
Hold treat near nose
Move treat toward shoulder
Continue moving treat to guide full roll
Say “Roll over” during the roll
Reward generously
Practice on soft surface initially
Patience Needed: Some Labs take longer to understand this trick.
Day 26: “Fetch and Drop” Game
Labrador Retrievers were bred to retrieve, making this a natural activity.
Training the Complete Retrieve:
Show favorite toy
Say “Fetch” and throw short distance
Encourage puppy to pick up toy
Call puppy back
Hold treat near toy
Say “Drop”
Trade treat for toy
Reward and repeat
Goal: Clean retrieve with automatic drop/release.
Day 27: Off-Leash Recall in Safe Area
Reliable recall is the most important safety command.
Safe Practice Method:
Use fenced area or long training line (20-30 feet)
Let puppy explore
Call “Come” with enthusiasm
Reward extremely well (jackpot treats)
Never chase if puppy doesn’t come
Practice multiple times
Gradually increase distractions
Safety Warning: Only practice off-leash in completely secure areas until recall is 100% reliable.
Day 28: Command Chains (Multiple Commands in Sequence)
Advanced training involves combining multiple commands.
Example Sequences:
Sit → Shake → Down → Roll Over
Come → Sit → Stay → Come
Down → Stay → Come → Sit
Benefits:
Improves focus and attention span
Demonstrates training mastery
Provides mental stimulation
Impresses friends and family
Day 29: Guest Greeting Challenge
Real-world application of all learned manners.
Setup:
Invite friend to door
Puppy must “Sit” and “Stay”
Friend enters
Puppy maintains sit/stay
Release with “Okay”
Puppy may greet politely (no jumping)
Reward excellent manners
This tests: Impulse control, obedience, and socialization progress.
Day 30: Graduation Day – Celebrating Success!
Congratulations! You’ve completed 30 days of Labrador training.
Graduation Activities:
Review all commands and tricks
Take photos and videos
Print completion certificate
Celebrate with special play session
Share progress with family
Plan continued training goals
Remember: Training is ongoing. Continue practicing and building on this foundation.
Essential Training Tips for Labrador Owners
Positive Reinforcement Works Best
Labrador training methods should focus on rewards, not punishment:
Use treats, praise, toys, and play as rewards
Ignore unwanted behaviors (when safe)
Redirect to appropriate behaviors
Never use physical punishment
Stay patient and consistent
Consistency is Critical
All family members must use:
Same commands
Same hand signals
Same rules
Same rewards
Same consequences
Inconsistency confuses your Lab and slows training progress.
Short, Frequent Training Sessions
Labs have short attention spans as puppies:
5-10 minute sessions
3-5 sessions daily
End on successful note
Keep it fun and positive
Allow rest between sessions
Exercise Requirements
Labrador Retrievers are high-energy dogs:
Puppies: 5 minutes per month of age (twice daily)
Adults: 60-90 minutes daily
Include mental stimulation
Swimming is excellent exercise
Tired dogs train better
Common Labrador Training Challenges and Solutions
Problem: Excessive Chewing
Solution:
Provide appropriate chew toys
Rotate toys to maintain interest
Puppy-proof your home
Redirect to appropriate items
Exercise adequately
Supervise when loose in house
Problem: Biting and Mouthing
Solution:
Yelp loudly when bitten
Immediately stop play
Redirect to toys
Never encourage rough play
Provide teething toys
Consider puppy socialization classes
Problem: House Training Accidents
Solution:
Increase outdoor trips
Watch for warning signs (sniffing, circling)
Clean accidents with enzymatic cleaner
Reward outdoor success
Confine to small area when unsupervised
Keep consistent schedule
Problem: Pulling on Leash
Solution:
Stop walking when pulling occurs
Change directions frequently
Reward loose-leash walking
Consider front-clip harness
Practice in low-distraction areas first
Be patient and consistent
Problem: Separation Anxiety
Solution:
Practice leaving for short periods
Don’t make departures/arrivals dramatic
Provide puzzle toys
Crate train properly
Exercise before leaving
Consider doggy daycare or dog walker
Beyond 30 Days: Continuing Your Labrador’s Training
Ongoing Training Goals
Training never truly ends. Continue developing:
Advanced obedience commands
Off-leash reliability
Therapy dog training
Service dog skills (if applicable)
Agility or dock diving
Scent work and tracking
Canine Good Citizen certification
Professional Training Options
Consider professional help for:
Puppy kindergarten classes
Basic obedience courses
Advanced training programs
Behavior problem correction
Specialized training (service, therapy, hunting)
Training Resources
Helpful resources for continued learning:
American Kennel Club (AKC) training guides
Certified Professional Dog Trainer (CPDT)
Association of Professional Dog Trainers (APDT)
Online training courses
YouTube training channels
Training books by certified trainers
Health and Training Connection
Proper Nutrition Supports Training
Feed high-quality puppy food:
Appropriate for large breed puppies
Balanced nutrition for growth
Proper portions (Labs tend to overeat)
Training treats should be 10% or less of daily calories
Fresh water always available
Veterinary Care
Regular vet visits ensure:
Proper vaccination schedule
Parasite prevention
Health clearances
Early detection of issues
Professional advice on development
Mental Stimulation Needs
Labs need mental exercise:
Puzzle toys and games
Training sessions
Nose work activities
New experiences and environments
Social interaction with dogs and people
Frequently Asked Questions About Labrador Training
How long does it take to potty train a Labrador puppy?
Most Labrador puppies are reliably potty trained by 4-6 months with consistent training. Some may take up to 8 months. Consistency and patience are key.
Are Labradors easy to train?
Yes, Labradors are among the easiest breeds to train due to their intelligence, food motivation, and eagerness to please. However, they can be energetic and easily distracted, requiring patience.
What age should I start training my Lab puppy?
Start training immediately at 8 weeks old. Early socialization (8-16 weeks) is critical for development. Basic commands can begin right away.
How much exercise does a Labrador puppy need?
Follow the 5-minute rule: 5 minutes of exercise per month of age, twice daily. A 3-month-old needs 15 minutes twice daily, while a 6-month-old needs 30 minutes twice daily.
Can older Labradors be trained?
Absolutely! While puppies learn faster, adult and senior Labs can learn new behaviors. Use the same positive reinforcement methods with patience.
Should I use a clicker for training?
Clickers are helpful but not required. They provide precise timing for marking desired behaviors. Many trainers use verbal markers like “Yes!” successfully.
How do I stop my Lab from jumping on people?
Ignore jumping completely, turn away, and only reward four-paws-on-floor behavior. Teach “Sit” for greetings. Consistency from all people is essential.
What’s the best reward for training Labs?
Most Labs are highly food-motivated. Use small, soft training treats. Some Labs also respond to toys, play, or praise. Find what motivates your individual dog.
Conclusion: Your Journey to a Well-Trained Labrador
Completing this 30-day Labrador training program establishes a strong foundation for a lifetime of companionship. Your dedication to positive reinforcement training, consistency, and patience will pay dividends as your puppy matures into a well-behaved, confident adult dog.
Remember that every Labrador is unique. Some may progress faster than others, and that’s perfectly normal. The key is maintaining consistency, celebrating progress, and continuing training beyond these initial 30 days.
Your Labrador Retriever has the potential to be an amazing companion, therapy dog, service animal, or family pet. With proper training, socialization, and care, you’re setting your Lab up for success in whatever role they fill in your life.
Keep training, stay positive, and enjoy the journey with your loyal Labrador companion!
About the Author: This comprehensive guide combines proven dog training methodologies with breed-specific insights for Labrador Retrievers, designed to help new Lab owners successfully train their puppies using positive, science-based methods.
🌍 Introduction: Escape the 9-to-5 and Embrace Freedom
In today’s digital age, the dream of financial freedom and location independence is more achievable than ever. Whether you’re stuck in a corporate job or simply craving a lifestyle upgrade, the 7 Figure Accelerator offers a proven blueprint to build a profitable online business — even if you have zero experience.
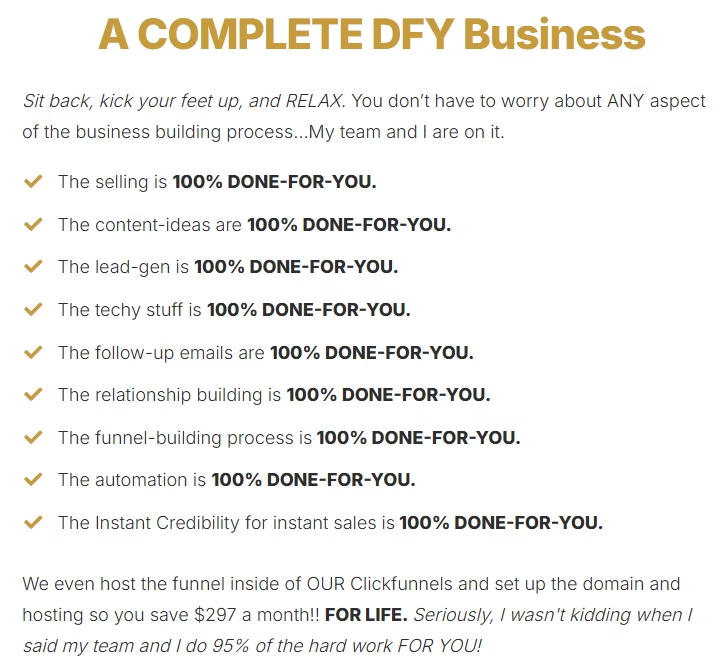
This isn’t just another course. It’s a done-for-you business system designed to help you launch, grow, and scale a digital business that can generate consistent income from anywhere in the world.
💡 What Is the 7 Figure Accelerator?
The 7 Figure Accelerator is a comprehensive online program created by Philip Johansen, a renowned digital entrepreneur. It’s designed to help aspiring business owners escape the rat race and build a sustainable online income stream.
Unlike traditional courses that leave you to figure things out, this program provides:
✅ A fully built business system
✅ Step-by-step training modules
✅ High-converting funnels and automation
✅ Personalized mentorship and support
Whether you’re a complete beginner or someone who’s tried and failed before, this accelerator is tailored to help you succeed.
🔍 Why Choose the 7 Figure Accelerator?
Here’s what sets this program apart from the rest:
1. Done-For-You Business Model
You don’t need to build a website, create products, or write sales copy. Everything is pre-built and optimized for conversions.
2. Proven Results
Philip Johansen and his team have tested this system over years, refining it to deliver real results. While individual success varies, the framework is designed to maximize your chances.
3. Mentorship That Matters
You’ll get access to a supportive community and direct mentorship from experts who’ve walked the path before you.
4. No Tech Skills Required
The system is beginner-friendly. If you can follow instructions, you can build your business.
🔑 Key Features of the Program
Feature
Description
✅ Business Built For You
Pre-designed funnels, email sequences, and product offers
🎓 Training Modules
Step-by-step video lessons covering traffic, conversion, and scaling
🧠 Mindset Coaching
Learn how to think like a 7-figure entrepreneur
💬 Community Access
Join a tribe of like-minded individuals for support and networking
📈 Scaling Strategies
Learn how to grow your income exponentially
📈 Who Is This Program For?
The 7 Figure Accelerator is ideal for:
Aspiring entrepreneurs
Stay-at-home parents
Digital nomads
Retirees looking for passive income
Anyone tired of the 9-to-5 grind
If you’re motivated, coachable, and ready to take action, this program can help you transform your life.
🔥 Real Benefits You’ll Experience
💸 Financial Freedom: Build a business that generates income while you sleep.
🏖️ Location Independence: Work from anywhere — beach, café, or your living room.
⏰ Time Flexibility: Say goodbye to rigid schedules and hello to freedom.
📚 Personal Growth: Develop the mindset and skills of a successful entrepreneur.
🧠 What You’ll Learn Inside the Program
✅ Module 1: Foundation & Mindset
Discover the core principles of success and how to rewire your mindset for abundance.
✅ Module 2: Funnel Setup
Get access to high-converting funnels and learn how to customize them for your brand.
✅ Module 3: Traffic Mastery
Learn how to drive targeted traffic using paid ads, organic strategies, and social media.
✅ Module 4: Conversion Secrets
Understand the psychology of sales and how to turn visitors into buyers.
✅ Module 5: Scaling & Automation
Automate your business and scale your income without working more hours.
💬 Testimonials & Success Stories
While results vary, many students have shared their transformational journeys:
“I went from zero to $10K/month in just 90 days. This program changed my life!” — Sarah M.
“I finally quit my job and now work from Bali. The freedom is unreal.” — James T.
Please note: This program does not guarantee income or success. Results depend on individual effort, market conditions, and other factors. The testimonials are not typical and are shared for inspiration only.
🛠️ Tools & Resources Included
Funnel templates
Email automation
Traffic training
Weekly coaching calls
Private Facebook group
Lifetime access to updates
💥 Bonuses You’ll Receive
🎁 Bonus #1: High-Ticket Affiliate Training
🎁 Bonus #2: Copywriting Masterclass
🎁 Bonus #3: Personal Branding Blueprint
These bonuses are designed to accelerate your success and give you an edge in the marketplace.
🧭 How to Get Started
Getting started is simple:
Visit the official website: freedomescapexcelerator.com
Watch the introductory video
Enroll in the program
Follow the steps and take action
📌 Final Thoughts: Is It Worth It?
If you’re serious about building a digital business and escaping the 9-to-5 grind, the 7 Figure Accelerator offers a powerful, proven path. With done-for-you systems, expert mentorship, and a supportive community, this program is a game-changer for anyone ready to take control of their future.
In today’s digital economy, short-form videos dominate platforms like TikTok, Instagram Reels, YouTube Shorts, and Facebook. The challenge? Creating high-quality, engaging, and viral-worthy videos consistently.
That’s where ViralReelAI Bundle steps in. This AI-powered tool promises to help marketers, business owners, and creators generate viral short videos in minutes — without expensive editors, complicated tools, or endless trial and error.
In this detailed ViralReelAI review, I’ll break down what the software does, who it’s for, its features, benefits, pricing, pros and cons, and whether it’s worth your investment.
What is ViralReelAI Bundle?
The ViralReelAI Bundle is an AI-driven video creation suite designed to make creating short, engaging videos as easy as clicking a button. Instead of spending hours editing in tools like Premiere Pro or Final Cut, ViralReelAI uses artificial intelligence to:
Generate video ideas
Create templates for TikTok, Reels, and Shorts
Add text overlays, captions, and effects automatically
Suggest trending hashtags and music
Optimize for multiple platforms
Whether you’re a digital marketer, affiliate, e-commerce seller, influencer, or small business, ViralReelAI helps you create scroll-stopping content faster than ever.
Why Short-Form Videos Are the Future of Marketing
Explosive Growth of TikTok, Reels, and Shorts
Statistics show that:
TikTok users spend 95 minutes per day on the platform.
Instagram Reels make up over 20% of time spent on IG.
YouTube Shorts receive 70 billion views daily.
This means if you’re not leveraging short videos, you’re leaving traffic, sales, and brand visibility on the table.
The Challenge of Manual Video Creation
Traditional video editing tools are:
Expensive ($50–$200/month)
Time-consuming (editing takes hours)
Complex (steep learning curves)
That’s exactly why tools like ViralReelAI are becoming essential for content creators and businesses.
Key Features of ViralReelAI Bundle
1. AI-Powered Video Creation
ViralReelAI uses AI to generate high-engagement videos from scratch. Just enter your topic, keyword, or script, and the system produces a ready-to-publish video.
2. Multi-Platform Templates
It includes templates for TikTok, Instagram, YouTube Shorts, and Facebook Reels so your content fits platform-specific requirements.
3. Trending Hashtags & Music Suggestions
AI scans trends and suggests hashtags, captions, and background tracks to maximize your reach.
4. Auto-Captions & Subtitles
85% of users watch videos without sound. ViralReelAI automatically generates captions, improving watch time and engagement.
5. One-Click Publishing
Publish directly to social media platforms or download your videos in HD.
6. Commercial & Agency Rights (Bonus)
Sell videos to clients and local businesses for additional income streams.
Benefits of Using ViralReelAI
Save Time: Create a video in minutes instead of hours.
Save Money: No need for expensive editors or freelancers.
Boost Engagement: AI ensures videos follow viral trends.
Scale Easily: Create 10, 20, even 50 videos per week with automation.
Increase Sales & Leads: More views = more clicks = more conversions.
Who Should Use ViralReelAI?
Affiliate marketers who need daily promotional videos
E-commerce sellers showcasing products
Coaches & consultants creating authority content
Small businesses wanting local exposure
Social media managers & agencies handling multiple clients
Influencers growing personal brands
ViralReelAI vs Traditional Video Editing Tools
Feature ViralReelAI Traditional Tools
Ease of Use Beginner-friendly Requires training Speed Minutes Hours Cost One-time / low cost $50–$200 per month AI Features Yes (auto ideas, captions, hashtags) No Commercial Rights Yes No Output Optimized TikTok/Reels/Shorts ready Manual resizing needed
Best suited for short-form videos, not long YouTube videos
Case Studies & Success Stories
Affiliate Marketer: Created 30 videos in a week, boosted CTR by 60%.
E-commerce Store: Used ViralReelAI for product demo reels, increased sales by 35%.
Agency Owner: Sold short videos to local businesses, generated $2,000+ in the first month.
ViralReelAI FAQs
1. Is ViralReelAI beginner-friendly?
Yes — no video editing skills required.
2. Can I use it for client work?
Yes, commercial and agency rights are included in the bundle.
3. Which platforms does it work with?
TikTok, Instagram, Facebook, YouTube, and more.
4. Do I need to download software?
No, it’s cloud-based — works in your browser.
5. Is there a money-back guarantee?
Yes, check the sales page for refund policy.
Final Verdict — Is ViralReelAI Worth It?
If you want to stay ahead in the short-form video revolution, ViralReelAI is one of the most powerful AI tools to create, publish, and monetize viral content at scale.
It eliminates the biggest barriers — time, cost, and skill — while giving you an edge with AI-driven trends, hashtags, and templates.
Discover ViralReelAI Bundle – the AI-powered video creation suite. Create, customize & share viral videos instantly. Get lifetime access today!
Why AI-Powered Videos Are Taking Over
Video is the most engaging form of content in 2025. Whether you’re a marketer, entrepreneur, or influencer, creating videos consistently is non-negotiable. But here’s the challenge: video production is expensive, time-consuming, and often requires skills most beginners don’t have.
That’s where ViralReelAI Bundle comes in — an all-in-one AI video creation platform designed to help anyone create professional, attention-grabbing, and viral-worthy videos in just minutes.
In this review, I’ll walk you through everything you need to know about ViralReelAI, its features, pricing, pros & cons, and why it could be the breakthrough tool you need in your content strategy.
What is ViralReelAI Bundle?
ViralReelAI Bundle is a complete AI-driven software suite that lets you:
Generate viral-style videos with AI prompts
Customize templates with your branding
Add captions, voiceovers, music & effects automatically
Share instantly across social media platforms
Think of it as your personal video marketing agency in a box. Instead of hiring editors or spending hours on tools like Premiere Pro, you can create high-quality videos in minutes.
Who is ViralReelAI For?
This product is perfect for:
🔹 Affiliate marketers who need promo videos quickly
🔹 Coaches & consultants building personal brands
🔹 Local businesses (restaurants, gyms, real estate) wanting social content
🔹 Agencies that deliver video services to clients
🔹 Influencers & content creators who want more reach without spending hours editing
ViralReelAI Features (Why It’s So Powerful)
AI Video Creation Engine
Simply enter a keyword, niche, or prompt, and ViralReelAI generates a ready-to-use video with captions, stock footage, transitions, and animations.
Huge Template Library
Get access to hundreds of done-for-you video templates designed for social media, ads, reels, and stories.
Multi-Language & Voiceover Support
Want to reach a global audience? ViralReelAI supports multiple languages, natural-sounding voiceovers, and text-to-speech integration.
Built-In Social Sharing
Post directly to YouTube, TikTok, Instagram, Facebook, or download your video in HD.
Commercial License
With the bundle, you also get the rights to sell videos you create to clients — opening a new income stream.
Benefits of Using ViralReelAI Bundle
✅ Save hours of editing time ✅ Create professional videos without skills ✅ Boost engagement on social platforms ✅ Drive more leads & sales with viral content ✅ Scale your agency or freelance business
How ViralReelAI Works (Step by Step)
Login to your ViralReelAI dashboard
Choose a template or let AI auto-generate a video from your prompt
Customize text, branding, images, music & voiceovers
Export your HD video or publish directly to your chosen platform
It’s as easy as writing a short description → getting a ready-made video.
Pricing – Is ViralReelAI Worth It?
The ViralReelAI Bundle is currently available at a discounted one-time price (check the link below). Compared to hiring freelancers or paying for monthly editing software, this is a massive money-saver.
Advanced customization options may take some practice
Real Use Cases & Success Stories
Marketers are already using ViralReelAI to:
Generate daily TikTok/Instagram reels without effort
Create promotional ads for clients
Build YouTube channels faster
Launch local business campaigns
Imagine uploading 30 videos in 30 days — without editing a single clip manually.
FAQs (SEO Long-Tail Optimized)
❓ What is ViralReelAI Bundle?
It’s an AI-powered software that helps you create viral videos quickly using templates, automation, and smart editing features.
❓ Is ViralReelAI beginner-friendly?
Yes — no technical skills required. Just type your prompt, choose a template, and download your video.
❓ Can I sell the videos I create?
Yes — the commercial license allows you to sell videos to clients and keep 100% of the profits.
❓ Does it work on mobile?
Yes — it’s cloud-based, so you can access it from any device (desktop, laptop, or mobile).
❓ How much does it cost?
Currently available as a discounted bundle deal (one-time payment).
Final Verdict: Should You Get ViralReelAI?
If you’re serious about growing on social media, generating leads, or selling video services, ViralReelAI Bundle is a no-brainer. It’s beginner-friendly, saves you time, and helps you stay consistent with video marketing.
")
")
")
")